In this post, we’ll guide you through your first steps in using and setting up Live Spirits. We understand that starting something new can be exciting yet overwhelming, so we’re here to make the process as seamless as possible for you.

Introduction
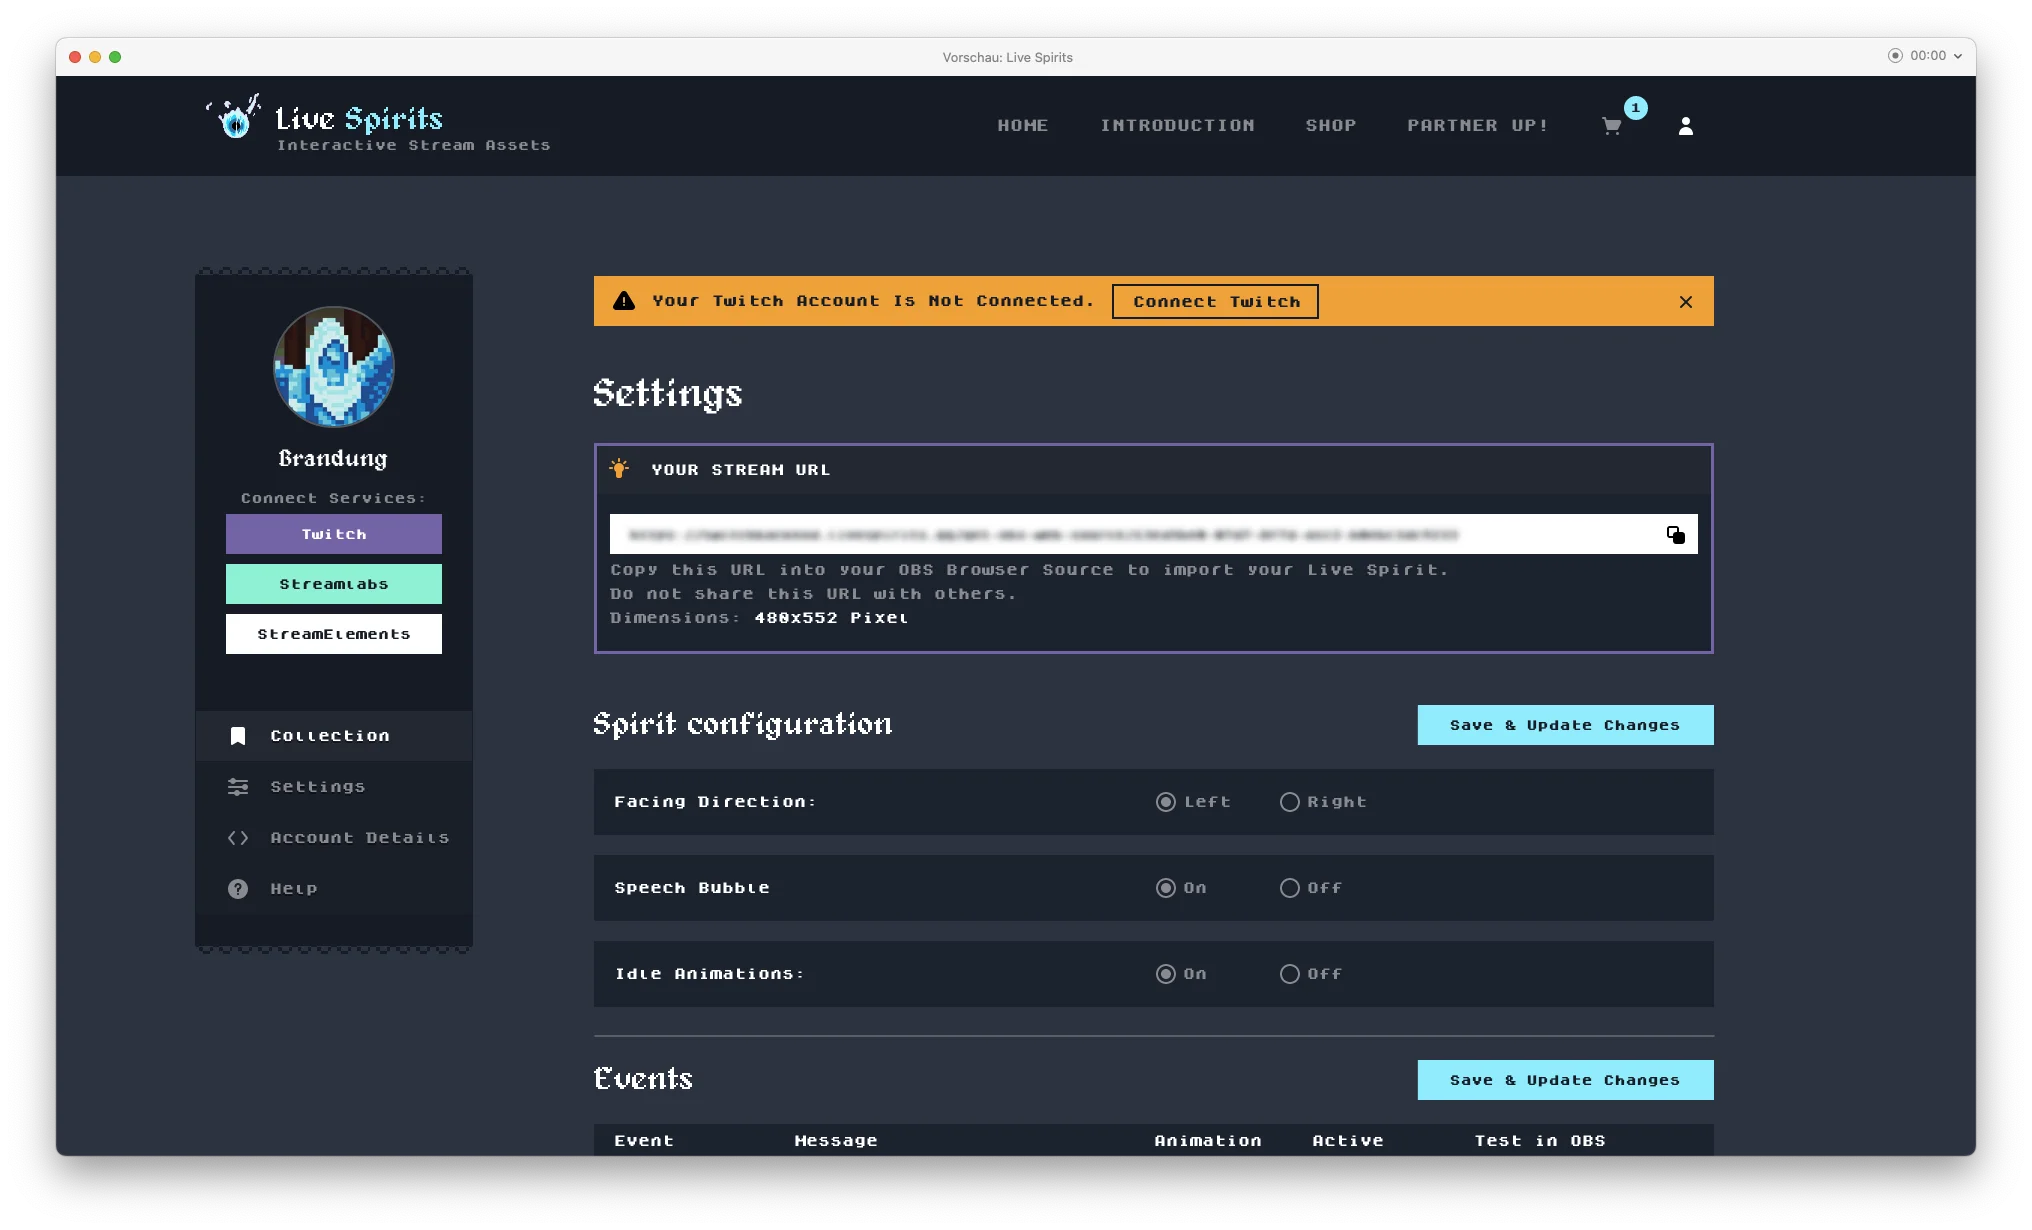
Getting Started
| Command | Description | Available Events |
|---|---|---|
| $username | Displays Twitch username | SubGifted subResubFollowGreetDonationCheer |
| $tier | Displays subscription tier | SubGifted subResub |
| $cumulativeAmount | Shows how many months have been given away to this user | Gifted sub |
| $message | Displays message by user. This can be empty or anonymous. | SubGifted subResubDonationCheer |
| $bits | Shows amount of Bits donated | Cheer |
| $duration | Shows how many month a user is subscribed | SubGifted subResub |
| $source | Displays the payment server used. F.e: PayPal | Donation |
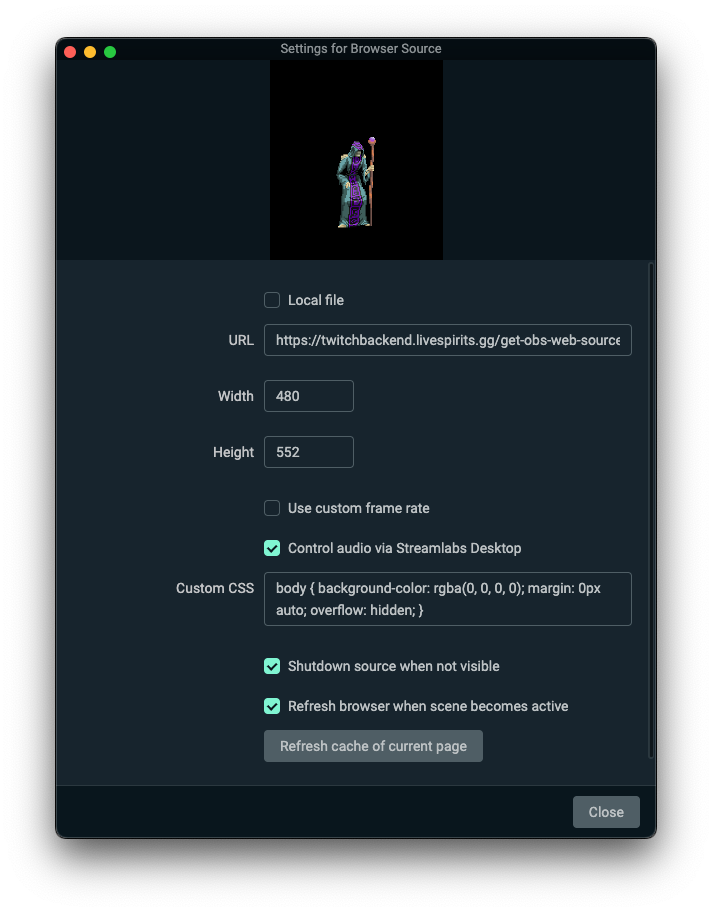
Set up your Live Spirit